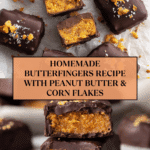
Healthy Homemade Butterfingers Recipe
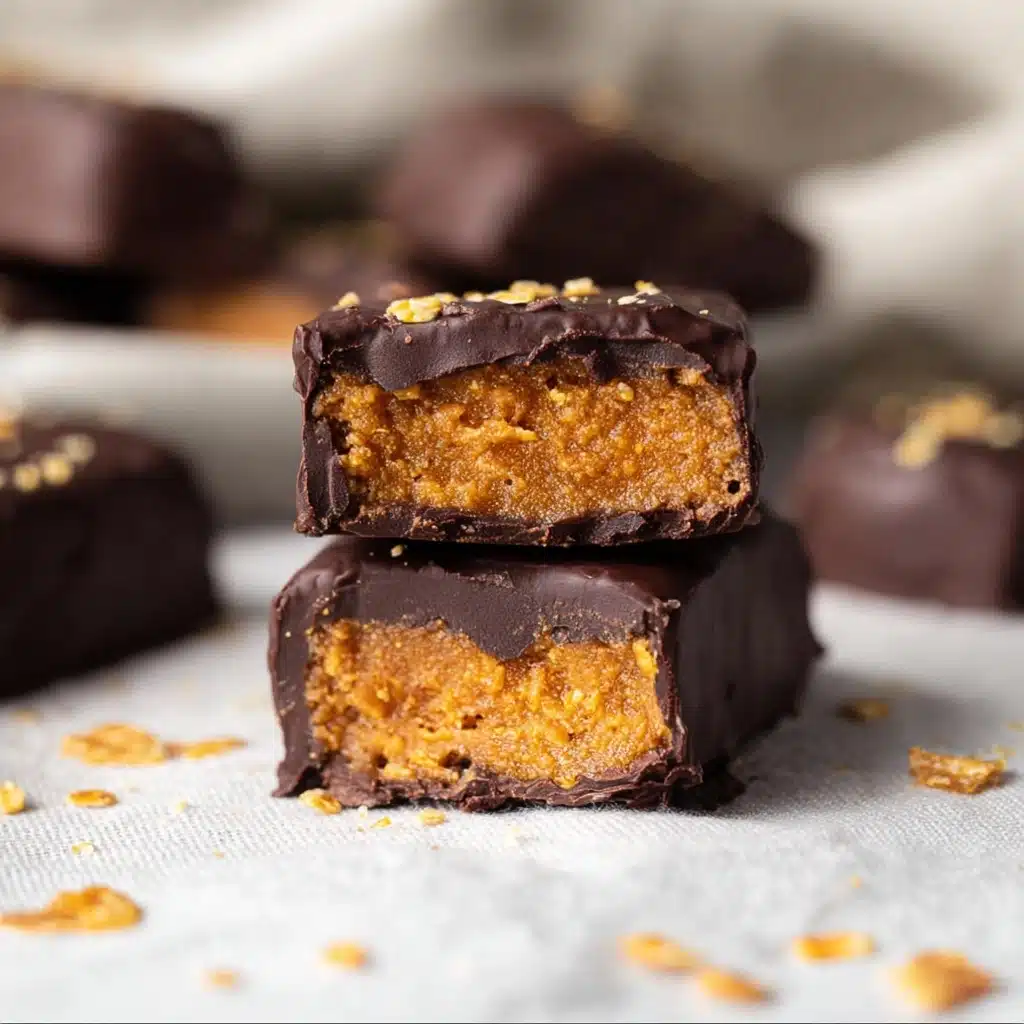
If you have a sweet tooth but want to keep things a little cleaner, these Healthy Homemade Butterfingers are the perfect treat to satisfy your cravings without the guilt. They’re crunchy, chocolatey, and packed with the natural goodness of peanut butter and a touch of maple syrup or honey. I love that they mimic the classic candy bar’s texture and flavor while using wholesome ingredients, making them a fun and nutritious snack for any time of day.

Ingredients You’ll Need
The magic of these Healthy Homemade Butterfingers lies in their simplicity. Each ingredient plays a vital role in creating that perfect balance of crunch, sweetness, and melt-in-your-mouth goodness.
- 1 cup peanut butter: Choose a natural, unsweetened peanut butter for the richest flavor and creamy texture that binds everything together.
- 1/3 cup maple syrup or honey: This natural sweetener adds just the right amount of sweetness and keeps the bars moist.
- 2 cups corn flakes: Light and crispy, they lend the iconic Butterfinger crunch and provide volume without heaviness.
- 1 cup chocolate chips: Use dark or semi-sweet for a luscious coating that hardens beautifully and complements the peanut butter.
- 2 teaspoons coconut oil: Helps the chocolate melt smoothly and sets shiny with a delicate snap when cooled.
How to Make Healthy Homemade Butterfingers
Step 1: Crush the Corn Flakes
Start by adding the corn flakes to a large zip-top bag, seal it tightly, and crush the cereal into small, bite-sized pieces. This step ensures that the crunch is just right without being too chunky or hard to bite through.
Step 2: Mix the Wet Ingredients
In a large mixing bowl, combine the peanut butter with your choice of maple syrup or honey. Stir until smooth and well-blended, creating a sweet and creamy base that will stick everything together perfectly.
Step 3: Combine with the Corn Flakes
Pour the crushed corn flakes into the bowl with the peanut butter mixture. Stir gently but thoroughly, making sure every crisp piece is coated with that luscious peanut butter and sweetener blend. This mixture is what gives these Healthy Homemade Butterfingers their signature texture.
Step 4: Press into the Pan
Line a loaf pan with parchment paper for easy removal. Transfer your mixture into the pan and press it down firmly and evenly. This step is key to creating bars that hold together well and slice neatly after freezing.
Step 5: Freeze to Set
Pop the pan into the freezer for at least one hour. This chilling time allows the bars to harden enough so they hold their shape when cut and dipped into chocolate.
Step 6: Cut and Coat with Chocolate
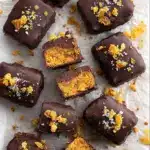
Once firm, lift the mixture out of the pan using the parchment paper. Place it on a cutting board and slice it into 12 individual bars. Melt the chocolate chips and coconut oil together until silky smooth, then dip each bar carefully to coat completely. This chocolate hug is what makes these treats irresistible!
Step 7: Final Chill
Set the coated bars on parchment-lined plates and pop them back into the freezer for about 10 minutes. This final chill hardens the chocolate shell and locks in all those wonderful flavors and textures.
How to Serve Healthy Homemade Butterfingers
Garnishes
You can sprinkle a pinch of toasted sea salt or crushed peanuts on top of the chocolate right after dipping for an added layer of flavor and texture. It gives a gourmet twist that really elevates these bars.
Side Dishes
These Healthy Homemade Butterfingers are fantastic on their own, but they also pair delightfully with a cup of fresh fruit salad or a dollop of Greek yogurt, balancing indulgence with freshness and creaminess.
Creative Ways to Present
For a fun party snack or gift idea, wrap each bar in parchment paper tied with twine or place them in mini decorative boxes. You can also drizzle a little white chocolate on top for a pretty contrast and extra sweetness.
Make Ahead and Storage
Storing Leftovers
Once coated, store your Healthy Homemade Butterfingers in an airtight container in the freezer. They keep exceptionally well and stay fresh and crunchy for up to 3 months, so you can enjoy them whenever a chocolate craving strikes.
Freezing
Freezing is actually the best way to store these treats since it preserves their texture and keeps the peanut butter from getting oily at room temperature. Just pop them out as needed and allow them to thaw for a few minutes before eating.
Reheating
Since these bars are meant to be enjoyed cold or at room temperature, avoid microwaving or reheating as it can melt the chocolate coating. Instead, let them sit out for a few minutes if they are too hard straight from the freezer.
FAQs
Can I use crunchy peanut butter instead of smooth?
Absolutely! Crunchy peanut butter adds an extra layer of texture inside the bars, which some people really enjoy. Just expect a bit more bite from little peanut chunks.
What other cereals can I substitute for corn flakes?
While corn flakes give the classic crunch, you can try Rice Krispies or gluten-free cereals if you want a slightly different texture or need a gluten-free option.
Is it okay to use regular sugar instead of maple syrup or honey?
Using traditional sugar isn’t recommended as it won’t bind the ingredients well or provide the same natural sweetness and moisture. Maple syrup or honey keeps everything chewy and fresh.
Can I make these butterfingers vegan?
Yes! Use a plant-based peanut butter that contains no animal products and swap honey for maple syrup to keep these bars completely vegan-friendly.
How long do they last once thawed?
After removing from the freezer, these Healthy Homemade Butterfingers are best enjoyed within a day or two at room temperature before they begin to soften and lose their signature crunch.
Final Thoughts
These Healthy Homemade Butterfingers have become my go-to treat for when I want something sweet, crunchy, and totally satisfying without loading up on processed ingredients. I can’t wait for you to try making them in your own kitchen and discover just how wonderfully simple and delicious a healthier candy bar can be. Trust me, once you make these, they’ll become a favorite snack you’ll want to whip up again and again!
PrintHealthy Homemade Butterfingers Recipe
This Healthy Homemade Butterfingers recipe offers a delicious and nutritious twist on the classic candy bar. Made with natural peanut butter, maple syrup or honey, crunchy corn flakes, and coated in rich chocolate, these bars are a perfect guilt-free treat that’s easy to prepare and freezer-friendly.
- Prep Time: 15 minutes
- Cook Time: 0 minutes
- Total Time: 1 hour 25 minutes
- Yield: 12 bars 1x
- Category: Snack, Dessert
- Method: No-Bake, Freezing
- Cuisine: American
- Diet: Gluten Free
Ingredients
Base Mixture
- 1 cup peanut butter
- 1/3 cup maple syrup or honey
- 2 cups corn flakes
Chocolate Coating
- 1 cup chocolate chips
- 2 teaspoons coconut oil
Instructions
- Crush Corn Flakes: Add the corn flakes to a large zip-top bag, seal it tightly, and crush the cereal into small pieces using a rolling pin or your hands, ensuring an even but coarse texture.
- Prepare Base Mixture: In a large mixing bowl, combine the peanut butter and maple syrup (or honey) until smooth and well blended. Add the crushed corn flakes and stir thoroughly, making sure every flake is coated and combined with the peanut butter mixture.
- Form Bars: Line a loaf pan with parchment paper, then transfer the mixture to the pan. Press it down firmly and evenly to create a compact layer. Place the pan in the freezer and chill for at least 1 hour so the bars can harden properly.
- Cut Bars: Once firm, remove the pan from the freezer and carefully lift the solidified mixture out using the parchment paper. Place it on a cutting board and cut into 12 evenly sized bars or rectangles.
- Melt Chocolate: In a microwave-safe bowl or over a double boiler, melt the chocolate chips with the coconut oil, whisking until smooth and glossy. This will create a silky coating for the bars.
- Coat Bars: Dip each bar individually into the melted chocolate, ensuring a full and even coating. Use a fork or dipping tool to lift the bars out, letting excess chocolate drip off. Place each coated bar on a parchment-lined plate.
- Set Chocolate: Transfer the coated bars back to the freezer for about 10 minutes or until the chocolate hardens completely.
- Store and Serve: Enjoy the butterfingers immediately or store them in an airtight container in the freezer for up to 3 months to maintain freshness and texture.
Notes
- You can substitute peanut butter with almond or cashew butter for variety.
- Use pure maple syrup or raw honey for natural sweetness and flavor.
- For a vegan version, ensure the chocolate chips are dairy-free and use maple syrup instead of honey.
- Keep the bars frozen for best texture and longevity.
- If crushed corn flakes are too fine, adjust crushing to maintain some crunch.
- Adding a pinch of sea salt to the base mixture can enhance the flavor profile.
Nutrition
- Serving Size: 1 bar (approx. 30g)
- Calories: 180
- Sugar: 9g
- Sodium: 65mg
- Fat: 12g
- Saturated Fat: 4g
- Unsaturated Fat: 7g
- Trans Fat: 0g
- Carbohydrates: 15g
- Fiber: 2g
- Protein: 5g
- Cholesterol: 0mg
Keywords: Healthy Butterfingers, Homemade Candy Bars, No-Bake Snacks, Peanut Butter Snacks, Gluten Free Treats, Easy Dessert Recipes