Chilaquiles Breakfast Casserole Recipe
Introduction
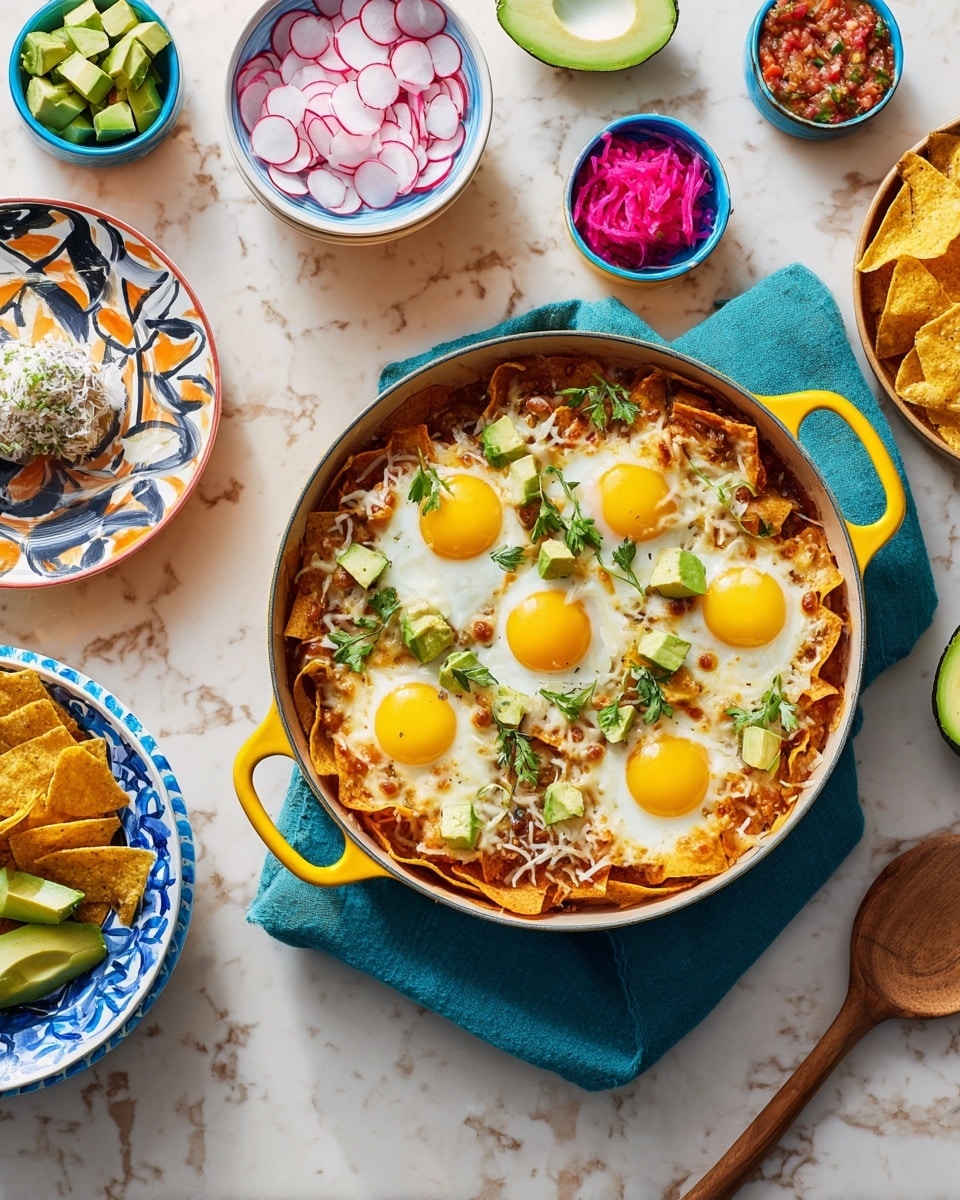
Chilaquiles Breakfast Casserole is a vibrant and comforting dish that combines the bold flavors of traditional Mexican chilaquiles with the ease of a baked casserole. Perfect for a weekend brunch or a hearty breakfast, it layers tortilla chips with a zesty sauce, melted cheeses, and optional eggs for a satisfying start to your day.
Ingredients
- 1 (15-ounce) can red enchilada sauce
- 1 cup salsa
- 1 (4-ounce) can Hatch green chiles
- 1 tablespoon lime juice
- 1/2 teaspoon chili powder
- 1/2 teaspoon ground cumin
- 1/2 teaspoon dried oregano
- 3 green onions, chopped
- 1 1/2 cups shredded Monterey Jack cheese
- 1 1/2 cups shredded Cheddar cheese
- 1 (10-ounce) bag tortilla chips
- 6 large eggs (optional)
- Avocado, queso fresco, cilantro, sour cream, and hot sauce for garnish
Instructions
- Step 1: Preheat your oven to 375°F (190°C).
- Step 2: In a bowl, whisk together the enchilada sauce, salsa, Hatch green chiles, lime juice, chili powder, cumin, oregano, and green onions until well combined.
- Step 3: Toss the Monterey Jack and Cheddar cheeses together in a separate bowl and set aside.
- Step 4: Pour one ladle of the sauce mixture into the bottom of a 9×12-inch baking dish, spreading it evenly.
- Step 5: Layer half of the tortilla chips evenly over the sauce. Ladle over half of the remaining sauce, then sprinkle half of the cheese mixture on top.
- Step 6: Repeat the layering with the remaining chips, sauce, and cheese.
- Step 7: Bake the casserole in the preheated oven for 20 to 25 minutes, until heated through and the cheese begins to brown.
- Step 8: During the last few minutes of baking, prepare the eggs by frying, poaching, or baking them directly atop the casserole if desired.
- Step 9: Serve hot, garnished with avocado slices, queso fresco, cilantro, sour cream, and your favorite hot sauce.
Tips & Variations
- For a spicier kick, add chopped jalapeños or a dash of cayenne pepper to the sauce mixture.
- Try swapping the tortilla chips for homemade fried tortillas for extra crunch and freshness.
- Customize the cheese blend by using Pepper Jack or a Mexican cheese blend for more flavor complexity.
- To make it vegetarian, omit the eggs or replace them with crumbled tofu.
Storage
Store any leftover casserole covered in the refrigerator for up to 3 days. Reheat individual portions in the microwave or oven until warmed through. If you included eggs, reheating gently helps maintain their texture.
How to Serve

Serve this delicious recipe with your favorite sides.
FAQs
Can I make this casserole ahead of time?
Yes, you can assemble the casserole a few hours ahead or the night before. Keep it covered in the refrigerator and bake just before serving.
What can I use instead of tortilla chips?
If you prefer, you can use fried or baked tortilla strips, or even leftover tortillas cut into triangles and toasted until crisp for a similar texture.
PrintChilaquiles Breakfast Casserole Recipe

This Chilaquiles Breakfast Casserole combines the vibrant flavors of traditional chilaquiles in a convenient, layered casserole form. Featuring crunchy tortilla chips smothered in a zesty red enchilada sauce blended with Hatch green chiles, spices, and fresh green onions, then topped with melted Monterey Jack and Cheddar cheeses. Optional eggs add a rich protein boost, while garnishes of avocado, queso fresco, cilantro, sour cream, and hot sauce elevate this dish to a perfect, satisfying breakfast or brunch.
- Prep Time: 15 minutes
- Cook Time: 25 minutes
- Total Time: 40 minutes
- Yield: 6 servings 1x
- Category: Breakfast, Brunch
- Method: Baking
- Cuisine: Mexican
- Diet: Vegetarian
Ingredients
Sauce and Base
- 1 (15-ounce) can red enchilada sauce
- 1 cup salsa
- 1 (4-ounce) can Hatch green chiles
- 1 tablespoon lime juice
- 1/2 teaspoon chili powder
- 1/2 teaspoon ground cumin
- 1/2 teaspoon dried oregano
- 3 green onions, chopped
Cheese and Chips
- 1 1/2 cups shredded Monterey Jack cheese
- 1 1/2 cups shredded Cheddar cheese
- 1 (10-ounce) bag tortilla chips
Optional Protein
- 6 large eggs (optional)
Garnishes
- Avocado
- Queso fresco
- Cilantro
- Sour cream
- Hot sauce
Instructions
- Preheat the Oven: Preheat your oven to 375°F (190°C) to ensure it’s ready for baking the casserole evenly.
- Make the Sauce Mixture: In a medium bowl, whisk together the red enchilada sauce, salsa, Hatch green chiles, lime juice, chili powder, ground cumin, dried oregano, and chopped green onions until well combined and flavorful.
- Prepare the Cheese: Toss together the shredded Monterey Jack and Cheddar cheeses in a separate bowl and set aside for layering.
- Layer the Casserole – First Layer: Pour one ladle of the sauce mixture into the bottom of a 9×12-inch baking dish to coat it evenly. Next, evenly spread half of the tortilla chips over the sauce layer in the dish.
- Layer the Casserole – Second Layer: Ladle half of the remaining sauce mixture over the tortilla chips. Then sprinkle half of the combined shredded cheeses evenly on top.
- Repeat the Layers: Repeat the layering process by adding the remaining tortilla chips, followed by the rest of the sauce mixture and finishing with the remaining cheese on top.
- Bake the Casserole: Place the baking dish in the preheated oven and bake for 20 to 25 minutes until the casserole is heated through fully and the cheese starts to turn golden brown and bubbly.
- Cook the Eggs (Optional): During the last few minutes of baking, prepare the eggs by frying, poaching, or baking them directly on top of the casserole according to your preference, adding a delicious protein element.
- Serve and Garnish: Remove the casserole from the oven and serve hot. Garnish with slices of avocado, crumbled queso fresco, fresh cilantro, a dollop of sour cream, and a drizzle of hot sauce for added flavor and an authentic finishing touch.
Notes
- You can customize the casserole by swapping Hatch chiles for other types of green chiles or mild peppers if unavailable.
- For a vegetarian option, omit the eggs or replace them with scrambled tofu.
- Use gluten-free tortilla chips if you require a gluten-free dish.
- To save time, the eggs can be baked on top of the casserole during the final 10 minutes of cooking.
- Leftovers can be refrigerated for up to 3 days and reheated in the oven or microwave.
Keywords: Chilaquiles, Breakfast Casserole, Mexican Breakfast, Enchilada Sauce, Tortilla Chips, Monterey Jack Cheese, Cheddar Cheese, Easy Breakfast, Brunch Recipe