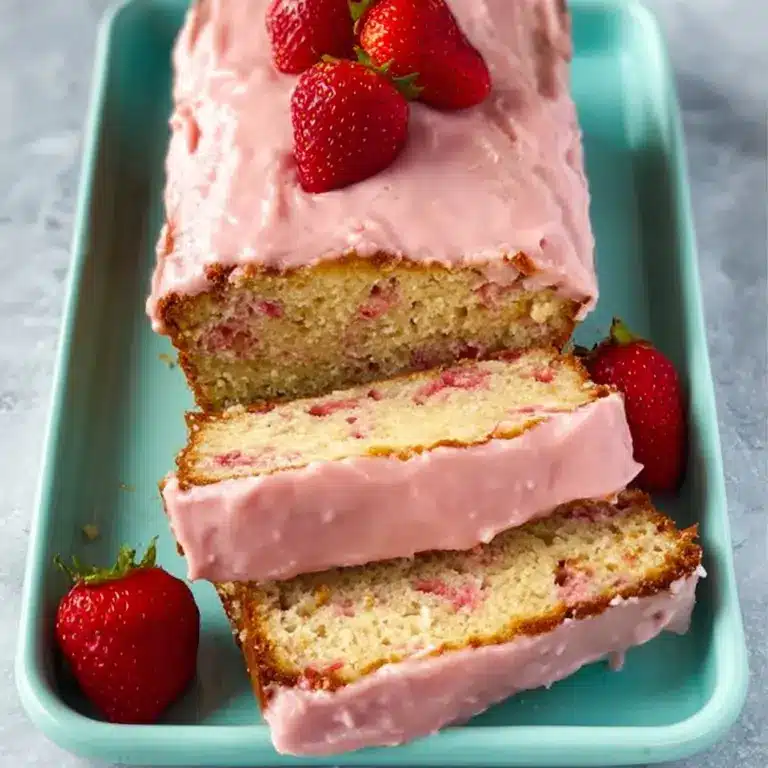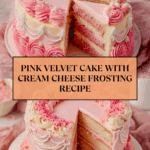
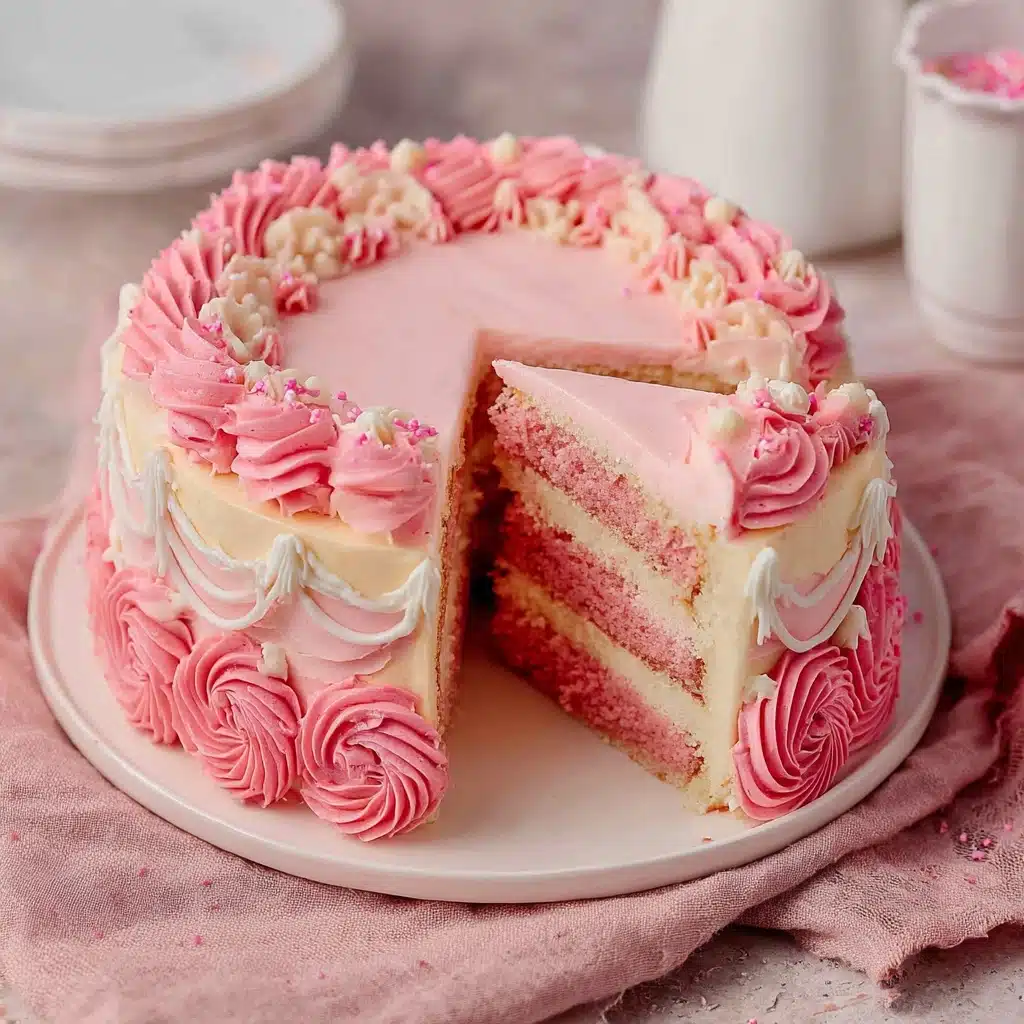
Mother’s Day Pink Velvet Cake Recipe
When it comes to celebrating the sweetest moments with your loved ones, nothing says love quite like a homemade treat. This Mother’s Day Pink Velvet Cake is an absolute showstopper, blending a delicate pink hue with the comforting richness of cocoa and the tangy delight of cream cheese frosting. It’s a cake that’s as beautiful to look at as it is delicious to eat, making it a perfect centerpiece for honoring the wonderful moms in your life. Easy to prepare yet impressively elegant, this cake brings together flavors and textures that will have everyone asking for seconds.
Ingredients You’ll Need
Gathering the right ingredients is the first step to baking this delightful Mother’s Day Pink Velvet Cake. Each component plays a crucial role in creating the cake’s signature softness, beautiful color, and perfect balance of flavor.
- 2 ½ cups cake flour: Provides a tender, fine crumb that’s essential for a soft cake.
- 1 ¾ cups granulated sugar: Sweetens the cake evenly, enhancing other flavors.
- ½ cup unsweetened cocoa powder: Gives a subtle cocoa richness, balancing the sweetness and contributing to the pink velvet’s unique flavor.
- 1 tbsp baking powder: Helps the cake rise beautifully and stay light.
- ½ tsp salt: Enhances all the flavors and ties them together.
- ¾ cup unsalted butter, softened: Adds moisture and a creamy texture to the batter.
- 4 large eggs (room temperature): Provide structure and lift when beaten with the butter and sugar.
- 1 cup buttermilk: Brings tenderness and a slight tang that pairs perfectly with the cocoa.
- 2 tsp pure vanilla extract: Adds warmth and depth to the overall flavor.
- Red food coloring: The secret to achieving that perfect pink hue to wow your guests.
- Cream cheese frosting: The luscious, tangy topping that completes the cake beautifully.
How to Make Mother’s Day Pink Velvet Cake
Step 1: Prepare Your Pans and Preheat the Oven
Start by preheating your oven to 350°F (175°C). While it warms up, grease and flour two 9-inch round cake pans thoroughly to ensure your cakes come out cleanly once baked. This little prep step is essential for a flawless bake that looks just as good as it tastes.
Step 2: Mix the Dry Ingredients
In a medium bowl, whisk together the cake flour, unsweetened cocoa powder, baking powder, and salt. This not only blends these crucial leaveners and flavor elements but also helps aerate the flour, setting the stage for a light and fluffy cake texture.
Step 3: Cream Butter and Sugar
Using a stand mixer or hand mixer, beat the softened butter and granulated sugar together until the mixture is light, fluffy, and pale in color—this usually takes about 3 minutes. This creaming process is key to incorporating air into the batter, ensuring your cake rises beautifully.
Step 4: Add the Eggs
Next, add eggs one at a time, beating well after each addition. This careful mixing ensures smooth batter consistency while helping to maintain the aeration achieved in the previous step.
Step 5: Combine Wet Ingredients
Now it’s time to add the buttermilk, vanilla extract, and red food coloring directly to the wet mixture. Stir until everything is evenly blended, and you spot that gorgeous pink hue—a true hallmark of your Mother’s Day Pink Velvet Cake.
Step 6: Incorporate the Dry Ingredients
Slowly fold the dry ingredient mixture into the wet ingredients, mixing gently until you have a smooth, uniform batter. The folding technique helps keep the batter light and airy, exactly what you want for a delicate crumb.
Step 7: Bake Your Cake Layers
Divide the batter evenly between the two prepared pans, smoothing the tops. Pop them into the oven and bake for 25 to 30 minutes. You’ll know they’re ready when a toothpick inserted into the center comes out clean. This balance between timing and doneness is what makes this cake tender without being dense.
Step 8: Cool Before Frosting
Once the cakes are out of the oven, let them cool in the pans for about 10 minutes before transferring each layer onto wire racks to cool completely. Patience here is key, as frosting warm cakes can cause melting and runny frosting.
Step 9: Frost and Decorate
After your cake layers are fully cool, generously apply cream cheese frosting over the top of one layer, place the second cake layer on top, and then frost the entire cake. The cream cheese frosting’s tang perfectly complements the subtle cocoa flavor while keeping the overall sweetness balanced.
How to Serve Mother’s Day Pink Velvet Cake
Garnishes
A simple cream cheese frosting finish is lovely on its own, but you can take your Mother’s Day Pink Velvet Cake to the next level with elegant garnishes. Fresh berries like raspberries or strawberries not only add natural sweetness but also a pop of color that complements the pink cake beautifully. A sprinkle of edible rose petals or a dusting of powdered sugar also adds a whimsical touch that makes the cake feel extra special.
Side Dishes
Pairing this cake with fresh fruit salad or a light sorbet can offer a refreshing contrast to the rich, velvety layers. A hot cup of tea or freshly brewed coffee can balance the cake’s sweetness, creating a complete and satisfying experience. These side dishes don’t compete but rather elevate every bite of your Mother’s Day Pink Velvet Cake.
Creative Ways to Present
Presentation makes all the difference when sharing the Mother’s Day Pink Velvet Cake with family and friends. Try stacking the cake with delicate fresh flowers on top or arrange single slices in pretty dessert plates with a drizzle of raspberry coulis. Even simple touches like colored cake stands or themed plates can add charm and celebrate the occasion beautifully.
Make Ahead and Storage
Storing Leftovers
If you’re lucky enough to have leftovers from the Mother’s Day Pink Velvet Cake, store them in an airtight container to keep that moist texture intact. Refrigeration is best due to the cream cheese frosting, and you can expect the cake to stay fresh for up to 3 days. Just remember to bring it to room temperature before serving to fully enjoy the flavors and softness.
Freezing
This cake freezes wonderfully, making it perfect for preparing ahead of time. Wrap individual slices or the whole frosted cake tightly in plastic wrap and aluminum foil. You can freeze the cake for up to 2 months. Thaw it overnight in the refrigerator to maintain the frosting’s texture and the cake’s delicate crumb.
Reheating
When you want to enjoy your Mother’s Day Pink Velvet Cake after storing, avoid microwaving the frosting directly, as it can melt. Instead, let the cake come to room temperature naturally or opt for a low-heat oven warm-up for a few minutes to refresh the softness without compromising the frosting’s creaminess.
FAQs
Can I use regular milk instead of buttermilk?
While regular milk can be used in a pinch, buttermilk is preferred because it adds a slight tanginess and helps tenderize the cake. If you don’t have buttermilk, adding a tablespoon of vinegar or lemon juice to one cup of milk can mimic the effect.
How much red food coloring should I use?
The amount of red food coloring depends on the brand and intensity you want. Start with a few drops and gradually add more until you get your desired shade of pink. Remember, the cocoa powder will slightly darken the color.
Can I make this cake gluten-free?
Yes! Substitute the cake flour with a gluten-free flour blend that includes xanthan gum or another binding agent. The texture might vary slightly, but it will still be moist and delicious.
Is cream cheese frosting necessary?
Cream cheese frosting is traditional for pink velvet cake because its tanginess balances the sweetness and cocoa flavor beautifully. However, you can also use a classic buttercream or whipped cream if you prefer a lighter topping.
How long does it take to bake the cake layers?
The cake layers typically bake in 25 to 30 minutes at 350°F (175°C). Keep an eye on them by inserting a toothpick to check for doneness—when it comes out clean, your cakes are ready!
Final Thoughts
Making this Mother’s Day Pink Velvet Cake is more than just baking; it’s creating a heartfelt moment for those you cherish. Its stunning color, tender crumb, and creamy frosting combine to create a truly unforgettable dessert. I can’t wait for you to make this cake your own and enjoy the joy it brings to your table, especially when celebrating your amazing mom. Trust me, once you try it, this cake will become one of your go-to favorites for special occasions!
PrintMother’s Day Pink Velvet Cake Recipe

Celebrate Mother’s Day with this delightful Pink Velvet Cake, a moist and tender chocolate cake infused with a pink hue and topped with creamy, tangy cream cheese frosting. Perfect for a sweet tribute to mom, this classic cake combines rich cocoa flavor with a hint of vanilla and a beautiful presentation.
- Prep Time: 20 minutes
- Cook Time: 30 minutes
- Total Time: 1 hour
- Yield: 12 servings 1x
- Category: Dessert
- Method: Baking
- Cuisine: American
- Diet: Vegetarian
Ingredients
Dry Ingredients
- 2 ½ cups cake flour
- ½ cup unsweetened cocoa powder
- 1 tbsp baking powder
- ½ tsp salt
Wet Ingredients
- ¾ cup unsalted butter, softened
- 1 ¾ cups granulated sugar
- 4 large eggs (room temperature)
- 1 cup buttermilk
- 2 tsp pure vanilla extract
- Red food coloring (to achieve desired pink hue)
Topping
- Cream cheese frosting (for topping)
Instructions
- Preheat Oven and Prepare Pans: Preheat your oven to 350°F (175°C). Grease and flour two 9-inch round cake pans to ensure the cakes release easily after baking.
- Mix Dry Ingredients: In a large bowl, whisk together the cake flour, unsweetened cocoa powder, baking powder, and salt until well combined. This ensures even distribution of leavening agents and cocoa.
- Cream Butter and Sugar: In a separate bowl, use an electric mixer to beat the softened butter and granulated sugar until the mixture is light in color and fluffy, about 3 minutes. This step incorporates air for a lighter cake texture.
- Add Eggs: Add the eggs one at a time to the creamed butter and sugar, beating well after each addition so the mixture is smooth and fully emulsified.
- Combine Wet Ingredients: Stir in the buttermilk, pure vanilla extract, and red food coloring until everything is incorporated into the batter, giving it the signature pink hue.
- Fold in Dry Ingredients: Gradually fold the dry ingredients into the wet ingredients using a spatula, mixing gently until the batter is smooth and uniform without overmixing.
- Divide and Bake: Evenly divide the batter between the two prepared cake pans. Bake in the preheated oven for 25 to 30 minutes, or until a toothpick inserted into the center comes out clean.
- Cool Cakes: Allow the cakes to cool in the pans for 10 minutes, then transfer them to wire racks to cool completely before frosting.
- Frost the Cake: Once the cakes are fully cooled, spread a generous layer of cream cheese frosting over the top and sides to finish. Serve and enjoy your beautiful Mother’s Day Pink Velvet Cake!
Notes
- Room temperature eggs help ensure better mixing and a smoother batter.
- Use good quality unsweetened cocoa powder for the best chocolate flavor.
- Adjust the amount of red food coloring to get your desired shade of pink without affecting the taste.
- Make sure cakes are completely cool before frosting to prevent melting.
- You can prepare the cake a day ahead and refrigerate it to save time.
Nutrition
- Serving Size: 1 slice (1/12 of cake)
- Calories: 360
- Sugar: 32g
- Sodium: 210mg
- Fat: 18g
- Saturated Fat: 10g
- Unsaturated Fat: 7g
- Trans Fat: 0.5g
- Carbohydrates: 45g
- Fiber: 2g
- Protein: 5g
- Cholesterol: 75mg
Keywords: Mother’s Day cake, pink velvet cake, cream cheese frosting, chocolate cake, festive desserts, celebration cake