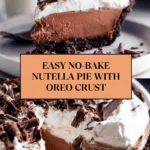
Nutella Pie with Oreo Crust and Fluffy Whipped Topping Recipe
Introduction
This Nutella Pie is a rich and creamy dessert with a crunchy Oreo crust and a luscious Nutella filling. It’s perfect for chocolate lovers looking for a no-bake treat that’s easy to make yet impressive to serve.
Ingredients
- 25 Oreos
- 3 tablespoons granulated sugar
- 4 tablespoons unsalted butter, melted and cooled
- 1 (8-ounce) package cream cheese, full-fat and softened to room temperature
- 1 ½ cups Nutella
- 1 teaspoon vanilla extract
- ¼ teaspoon salt
- 6 ounces frozen whipped topping, fully thawed (such as Cool Whip®)
- ½ cup heavy cream
- 1 tablespoon powdered sugar
- 1 teaspoon vanilla extract
- 1/8 teaspoon salt
- 1 chocolate bar (dark or milk) for garnish
Instructions
- Step 1: Make the Oreo crust by pulsing Oreos (cookies and filling) in a blender or food processor until fine crumbs form. Stir in granulated sugar and cooled melted butter.
- Step 2: Spray a 9-inch pie pan with cooking spray. Press the Oreo mixture evenly along the bottom and about 1 inch up the sides. Place the crust in the freezer while preparing the filling.
- Step 3: In a large bowl, beat the softened cream cheese with a hand mixer until smooth and creamy, about 30 seconds to 1 minute.
- Step 4: Add Nutella, vanilla extract, and salt. Beat for 1 to 3 minutes until fully combined and smooth.
- Step 5: Fold in 6 ounces of thawed whipped topping gently with a spatula until the mixture is light and smooth.
- Step 6: Pour the Nutella filling into the prepared Oreo crust. Cover and freeze for 1 to 3 hours, or until firm.
- Step 7: To make the whipped cream, combine heavy cream, powdered sugar, vanilla extract, and salt in a chilled bowl. Whisk on low speed, then gradually increase to high until medium to stiff peaks form, about 1 to 3 minutes.
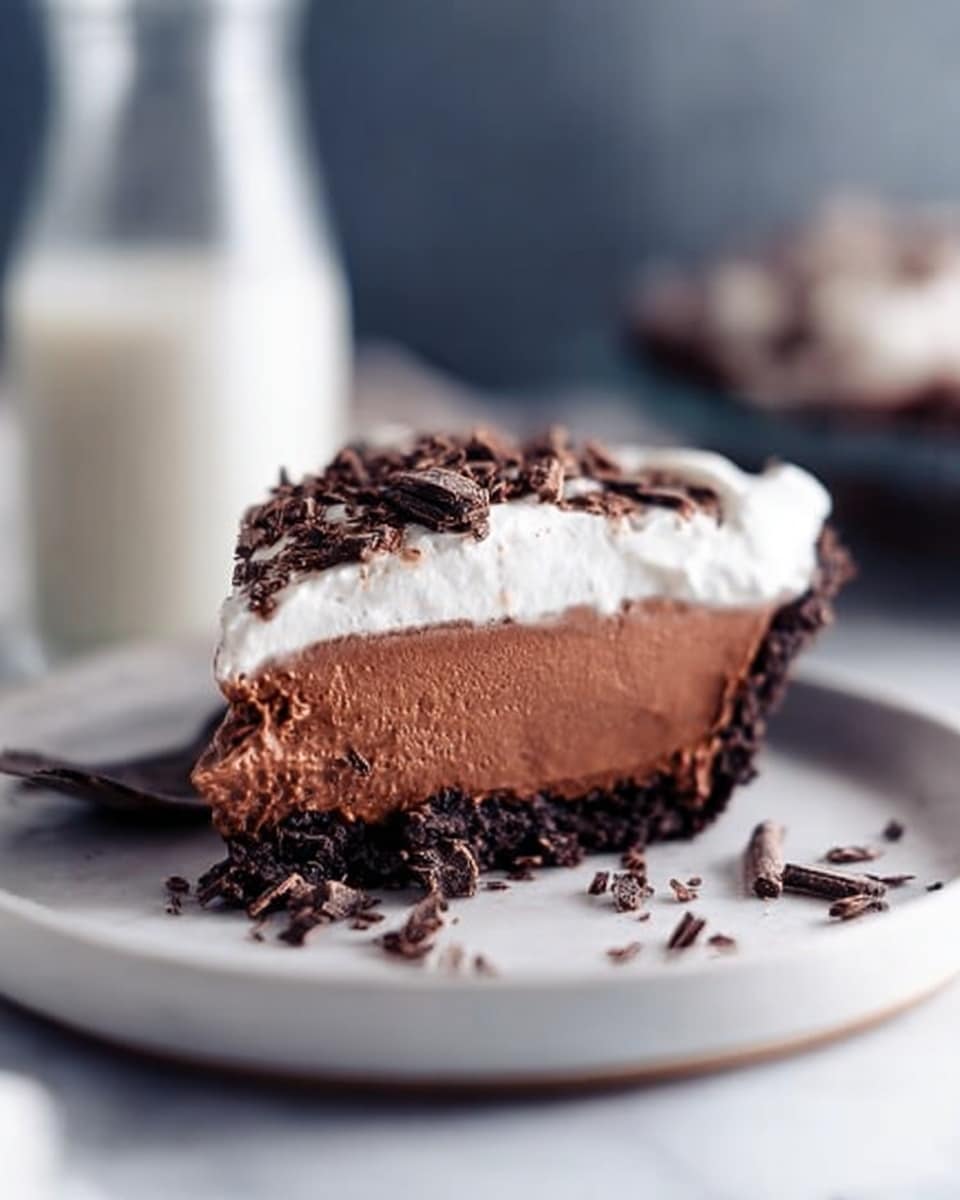
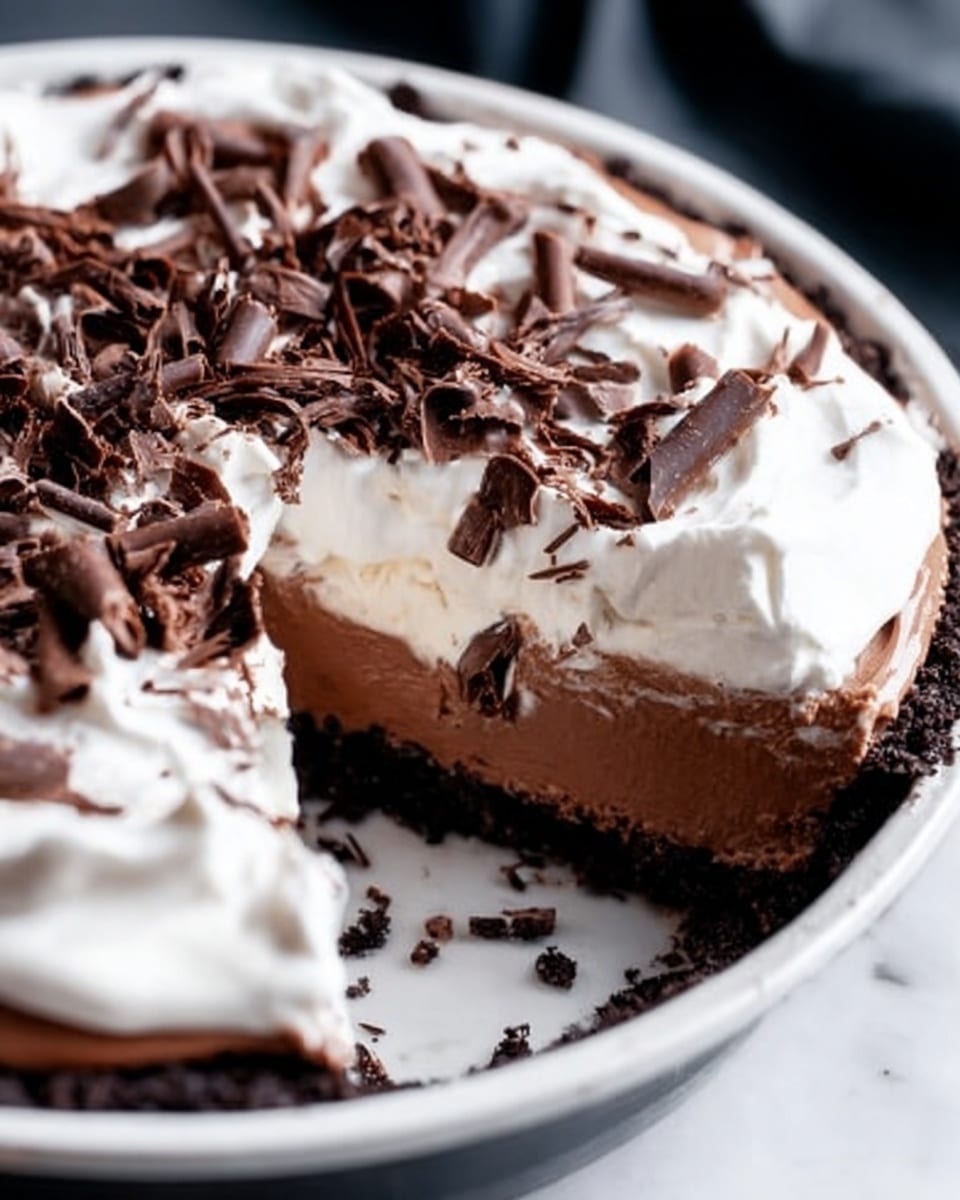
- Step 8: Spread the whipped cream over the center of the pie, leaving about 1 to 2 inches of crust showing around the edges. Use a spatula to create texture and dimension.
- Step 9: Use a vegetable peeler to shave curls from the chocolate bar and sprinkle them over the whipped cream topping.
- Step 10: Return the pie to the freezer uncovered for 10 minutes. Slice into pieces and serve.
Tips & Variations
- For a nut-free version, use a chocolate-hazelnut spread substitute that is allergy-friendly.
- If you plan to have leftovers, do not top the whole pie with whipped cream as it may become watery. Instead, add whipped cream to individual slices before serving.
- You can substitute the Oreo crust with graham cracker crumbs for a different flavor.
- For extra crunch, sprinkle chopped toasted hazelnuts on top along with the chocolate curls.
Storage
Store the pie covered in the freezer for up to 5 days. To enjoy, slice while still cold. If topped with whipped cream, serve immediately or separately to avoid sogginess. Defrost slightly before serving for easier slicing.
How to Serve
Serve this delicious recipe with your favorite sides.
FAQs
Can I make this pie ahead of time?
Yes, this pie is great to prepare a day in advance and keep frozen. Just add the whipped cream topping right before serving for best texture.
Can I use a different type of cookie for the crust?
Absolutely. While Oreos are classic, graham crackers or chocolate wafer cookies can also make delicious crusts. Adjust sugar and butter amounts as needed for binding.
PrintNutella Pie with Oreo Crust and Fluffy Whipped Topping Recipe

This luscious Nutella Pie features a crunchy Oreo crust filled with a creamy Nutella and cream cheese mixture, topped with fluffy homemade whipped cream and elegant chocolate curls. Perfectly balanced between rich and airy textures, this no-bake dessert is chilled to set and offers a delightful treat for chocolate lovers.
- Prep Time: 20 minutes
- Cook Time: 0 minutes
- Total Time: 4 hours (including chill time)
- Yield: 8 servings 1x
- Category: Dessert
- Method: No-Cook
- Cuisine: American
Ingredients
Oreo Crust
- 25 Oreos
- 3 tablespoons granulated sugar
- 4 tablespoons unsalted butter, melted and cooled
Nutella Filling
- 1 (8-ounce) package cream cheese, full-fat, softened to room temperature
- 1½ cups Nutella
- 1 teaspoon vanilla extract
- ¼ teaspoon salt
- 6 ounces frozen whipped topping (such as Cool Whip®), fully thawed
Whipped Cream Topping
- ½ cup heavy cream
- 1 tablespoon powdered sugar
- 1 teaspoon vanilla extract
- ⅛ teaspoon salt
- 1 chocolate bar (dark or milk chocolate) for curls
Instructions
- Make Oreo Crust: Blend or pulse the Oreos, including the filling, in a food processor until they resemble fine crumbs. Combine the crumbs with granulated sugar and cooled, melted butter. Spray a 9-inch pie pan or spring-form pan with cooking spray, then press the cookie crumb mixture evenly along the bottom and about 1 inch up the sides. Place the crust in the freezer to set while preparing the filling.
- Make Nutella Filling: In a large bowl, beat the softened cream cheese with a hand mixer until smooth and creamy without lumps, about 30 seconds to 1 minute. Add Nutella, vanilla extract, and salt, then beat for 1 to 3 minutes until fully combined and smooth. Fold in 6 ounces (¾ cup) of thawed whipped topping gently using a spatula until the mixture is light and smooth. Pour this filling into the prepared Oreo crust. Cover and freeze for 1 to 3 hours until firm.
- Make Whipped Cream: Chill a mixing bowl. Pour heavy cream, powdered sugar, vanilla extract, and salt into the bowl attached to a stand mixer. Whisk on low speed to combine, then gradually increase to high speed and whip until medium to stiff peaks form, about 1 to 3 minutes. Monitor carefully to avoid overwhipping. Taste and adjust sweetness as desired.
- Decorate the Pie: Use a spatula to spread the stiff whipped cream over the center of the pie, smoothing and texturing it to cover most of the surface while leaving about 1 to 2 inches of the crust edge visible. Using a vegetable peeler, shave chocolate curls from the side of a chocolate bar directly on top of the whipped cream. Return the pie to the freezer uncovered for 10 minutes to set the topping. Slice into pieces and serve. Note: Do not top the entire pie with whipped cream if storing leftovers, as it will become watery. Instead, add whipped cream to individual slices when serving.
Notes
- Use full-fat cream cheese softened to room temperature for the best texture in the filling.
- Freezing the crust before adding the filling helps maintain a firm base that won’t crumble.
- When whipping the cream, watch closely to avoid turning it into butter.
- Top individual slices with whipped cream if pie leftovers will be stored to prevent the cream from becoming watery.
- The chocolate curls add an elegant decorative touch but can be omitted if desired.
Keywords: Nutella pie, Oreo crust, no bake dessert, chocolate pie, whipped cream topping, easy dessert, chocolate dessert