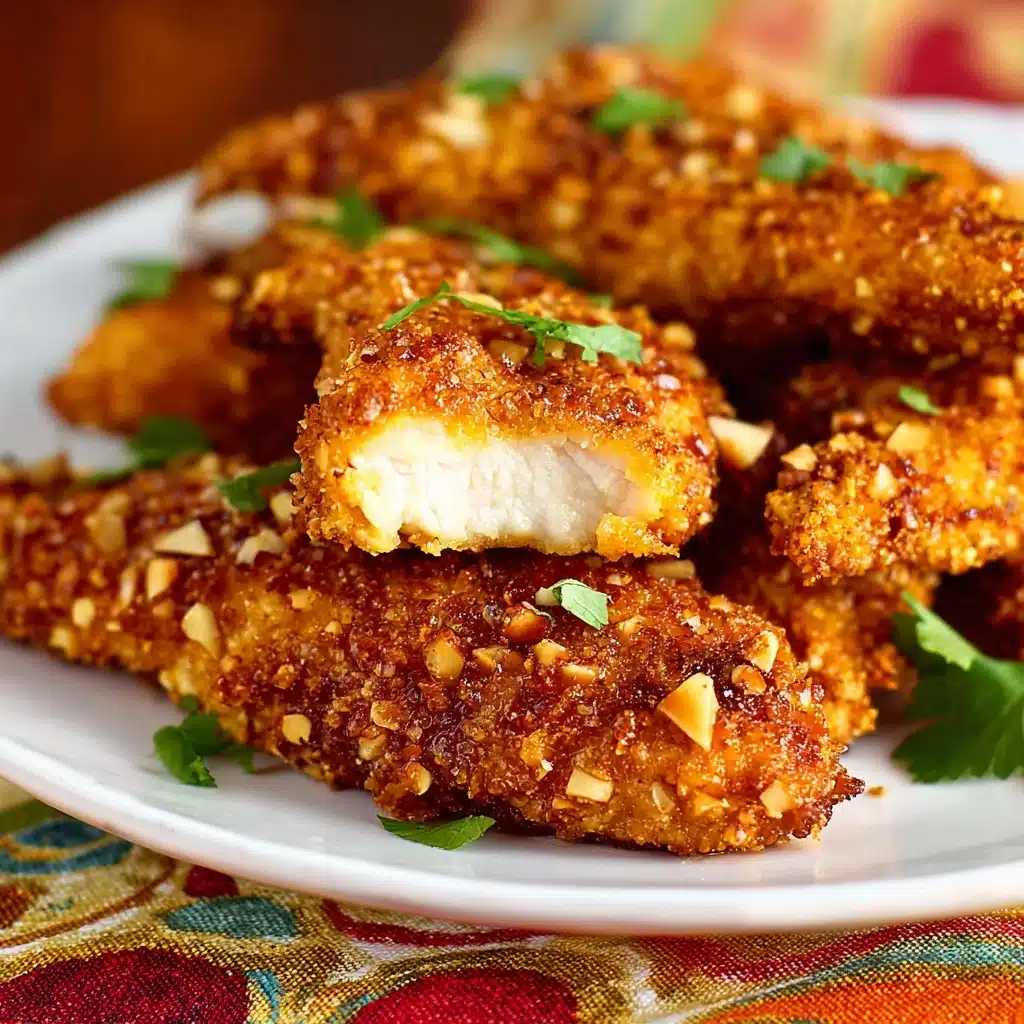
Thai Sticky Chicken Fingers Recipe
There is something irresistibly fun and flavorful about Thai Sticky Chicken Fingers that makes them a perfect choice for any casual dinner or party snack. These golden-crisp chicken strips are coated in a crunchy almond and breadcrumb crust and then drenched in a luscious, sweet, tangy, and slightly spicy Thai-inspired sauce that clings beautifully to every bite. The balance of textures and bold flavors is downright addictive, and once you make these, they’re bound to become a favorite in your kitchen too!
Ingredients You’ll Need
Each ingredient in this recipe plays an essential role in transforming simple chicken into the crave-worthy Thai Sticky Chicken Fingers you’ll love. From the crunchy coating to the sweet-and-spicy sauce, everything comes together to create harmony of taste and texture.
- Chicken breasts (1-3/4 lbs): Cut into 1-inch strips, these juicy pieces are the star protein to soak up all the delicious coating and sauce.
- Gluten free flour (1/2 cup): The base for breading that helps the crumb mixture stick perfectly to each chicken finger.
- Salt and pepper: Simple seasonings that enhance the natural flavor of the chicken and coating.
- Eggs (2): Whisked with milk, they act as the adhesive that binds the coating to the chicken.
- Milk (2 tablespoons): Adds moisture to the egg wash for better breading adherence.
- Rice Chex (4 cups, pulverized): Creates a light, crispy crumb layer when combined with almonds.
- Sliced almonds (3/4 cup, divided): Adds nutty crunch and flavor, with part pulsed into crumbs and part used as a garnish.
- Cilantro (1/4 cup, chopped): Gives fresh herbal brightness sprinkled on top at the end.
- Sweet chili sauce (1/2 cup): The foundation of the sticky glaze, delivering sweetness and tang.
- Water (1/2 cup): Used to thin the sauce for perfect consistency.
- Brown sugar (1/4 cup): Rounds out the sauce with mellow caramel tones.
- Tamari (1/4 cup): A gluten-free soy sauce alternative adds savory depth and umami.
- Rice vinegar (2 tablespoons): Brings gentle acidity to balance the sauce’s sweetness.
- Fresh lime juice (2 tablespoons): Brightens and lifts the flavor for an authentic Thai touch.
- Ground ginger (1/2 teaspoon): Imparts a warm, aromatic spice that’s essential in Thai cooking.
- Garlic (1 clove, minced): Adds pungent savory notes to the sauce.
- Red chili pepper flakes (1/4 teaspoon): Gives just the right kick of heat, adjustable to your taste.
How to Make Thai Sticky Chicken Fingers
Step 1: Prepare Your Baking Sheets
Start by lining two half-sheet pans with parchment paper or foil and spraying them generously with nonstick spray. This simple step ensures the chicken fingers bake evenly and don’t stick, making cleanup a breeze and keeping the coating intact.
Step 2: Make the Crumbs
Next, whisk together the eggs and milk in a shallow dish for the egg wash. Using a food processor, pulse half of the sliced almonds until they become fine crumbs. Add the Rice Chex and process until finely ground, then combine the almond crumbs with the Rice Chex crumbs in another dish. Season this mixture with salt and pepper to give your coating a flavorful crunch.
Step 3: Coat the Chicken Fingers
Place the flour, salt, and pepper into a large Ziplock bag, add the chicken strips, and toss to coat evenly. Shake off any excess flour, then dip each strip into the egg wash before rolling them thoroughly in the almond and bread crumb mixture. Press the crumbs firmly so they stick. Lay the coated fingers on your prepared pans and refrigerate for 20 to 30 minutes to help the coating set—trust me, this step makes all the difference in keeping your breading perfectly attached during baking.
Step 4: Bake to Golden Perfection
Preheat your oven to 425 degrees Fahrenheit. Spray the tops of the chicken fingers with olive oil or a nonstick spray to help the crust crisp up beautifully. Bake for 10 minutes, then carefully flip each piece, spray again, and return to the oven for another 7 to 9 minutes until the fingers turn golden and reach a safe internal temperature.
Step 5: Prepare the Sticky Sauce
While the chicken bakes, combine the sweet chili sauce, water, brown sugar, tamari, rice vinegar, lime juice, ginger, garlic, and red chili flakes in a small saucepan. Bring to a simmer over medium-high heat, then reduce to medium and let it gently bubble until the sauce thickens slightly, about 5 to 6 minutes. This sauce is what truly elevates the Thai Sticky Chicken Fingers into a mouthwatering delight.
Step 6: Glaze and Final Bake
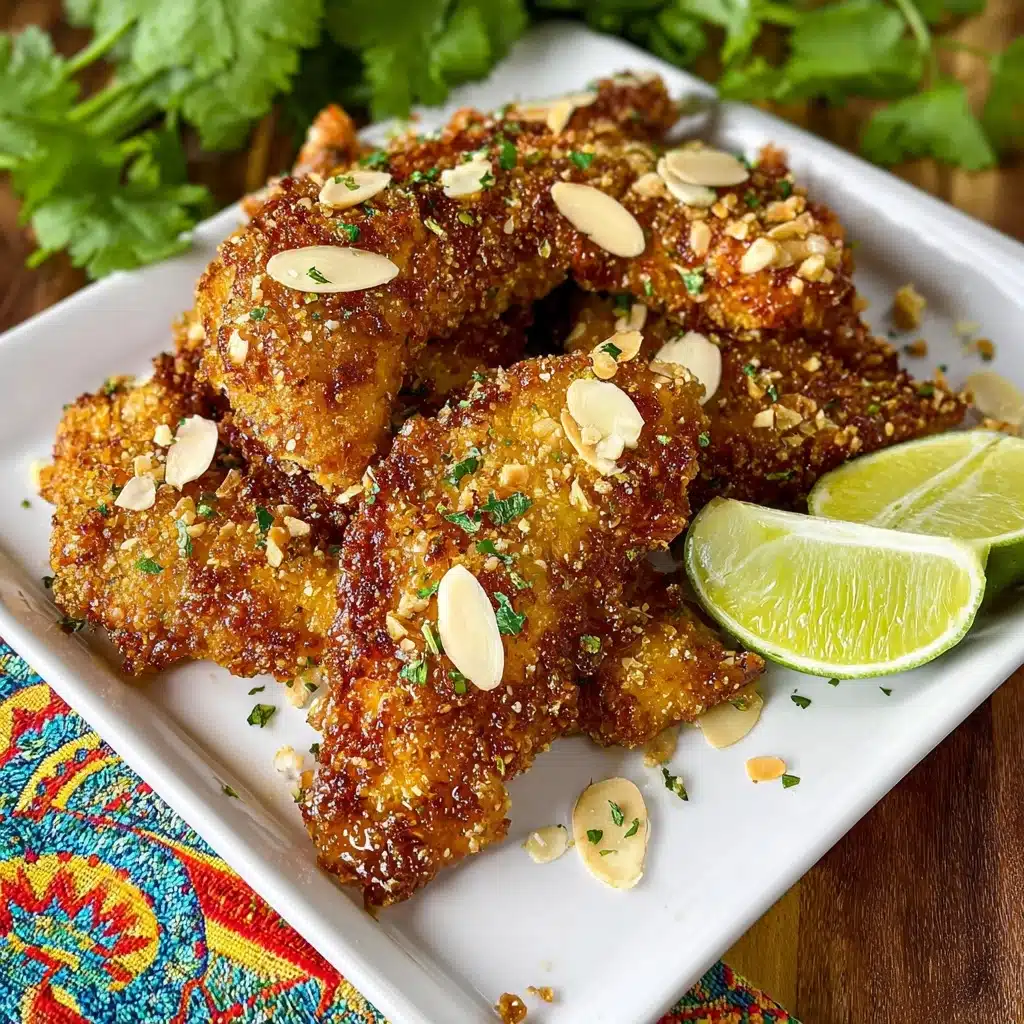
Dip each baked chicken finger into the sauce using tongs, ensuring they’re generously coated. Place them back on the baking sheets and bake for another 4 to 5 minutes, keeping a close eye so nothing burns. Finish by sprinkling with the remaining sliced almonds and chopped cilantro right before serving for a fresh crunch and herbaceous note.
How to Serve Thai Sticky Chicken Fingers
Garnishes
A sprinkle of freshly chopped cilantro and the remaining sliced almonds brings vibrant color, fresh aroma, and extra crunch that contrast the sweet and spicy glaze beautifully. Consider adding thin slices of fresh red chili or lime wedges for those who want a little extra zing at the table.
Side Dishes
These chicken fingers pair wonderfully with fluffy jasmine rice or a simple brown rice to soak up every drop of sauce. For a lighter touch, serve alongside crunchy cucumber salad or a crisp Asian slaw tossed with lime juice and a hint of sesame oil to brighten the plate.
Creative Ways to Present
For a fun twist, stack the Thai Sticky Chicken Fingers as an appetizer tower or present them on a wooden board with small bowls of extra sauce for dipping. You could even skewer the fingers with fresh herbs for an elegant finger food display at your next gathering.
Make Ahead and Storage
Storing Leftovers
Place any leftover chicken fingers in an airtight container and keep them refrigerated for up to 3 days. To maintain the best texture, store the sauce separately and recoat the chicken before reheating.
Freezing
You can freeze the cooked chicken fingers by laying them flat in a single layer on a baking sheet first, freezing until firm, then transferring them to freezer bags or containers. Freeze for up to 2 months for best quality.
Reheating
To reheat, place the chicken fingers on a baking sheet and warm in a preheated 350-degree oven for 10 to 15 minutes until hot and crisp again. Reheat the sauce gently on the stovetop and toss the chicken fingers in it just before serving to revive that glossy sticky coating.
FAQs
Can I use regular flour instead of gluten-free?
Absolutely! If gluten is not a concern, all-purpose flour works perfectly in this recipe and won’t affect the flavor or texture of the Thai Sticky Chicken Fingers.
What if I don’t have Rice Chex cereal?
You can substitute with gluten-free bread crumbs or even crushed cornflakes for a similar crunch. Just be sure to process them finely with the almonds for that perfect coating.
Is there a vegetarian or vegan alternative for this dish?
While the original is chicken-based, you could try this recipe with firm tofu strips or cauliflower florets as a fun plant-based twist. Use vegan egg substitutes and a plant-based milk to keep the coating sticky and crisp.
How spicy are the Thai Sticky Chicken Fingers?
The heat level can be adjusted easily by the amount of red chili flakes you add. The base recipe is mildly spicy but can be turned up or down depending on your preference.
Can I make the sauce ahead of time?
Yes! The sauce stores well in the refrigerator for up to a week and actually tastes better as the flavors meld. Just reheat gently before coating the chicken fingers.
Final Thoughts
Thai Sticky Chicken Fingers are one of those magical recipes that feel fancy but come together with surprisingly simple ingredients and steps. This dish is a guaranteed crowd-pleaser with its crunchy coating, bold flavors, and that addictive sticky glaze. I hope you give these a try soon and find yourself making them as often as I do—they’re simply too good to resist!
“`
PrintThai Sticky Chicken Fingers Recipe

These Thai Sticky Chicken Fingers are crispy, flavorful, and coated in a sweet and tangy homemade sauce. Perfect for a gluten-free snack or meal, they feature tender chicken strips breaded in a crunchy almond and gluten-free crumb mixture, baked to golden perfection, and glazed with a delicious sticky sauce made from tamari, brown sugar, and lime juice. Garnished with fresh cilantro and sliced almonds for added texture and flavor.
- Prep Time: 20 minutes
- Cook Time: 30 minutes
- Total Time: 50 minutes
- Yield: 4 servings 1x
- Category: Main Course
- Method: Baking
- Cuisine: Thai
- Diet: Gluten Free
Ingredients
Chicken and Coating
- 1–3/4 lbs chicken breasts, cut into 1” thick strips
- 1/2 cup gluten free flour (or all-purpose flour if not gluten-free)
- Salt and pepper, to taste
- 2 eggs
- 2 Tablespoons milk (any kind)
- 4 cups gluten-free Rice Chex pulverized into 2 cups crumbs OR 2 cups gluten free bread crumbs
- 3/4 cup sliced almonds, divided
Sauce
- 1/2 cup sweet chili sauce
- 1/2 cup water
- 1/4 cup brown sugar
- 1/4 cup gluten free reduced-sodium Tamari (or soy sauce if not gluten-free)
- 2 Tablespoons rice vinegar
- 2 Tablespoons fresh lime juice
- 1/2 teaspoon ground ginger
- 1 clove garlic, pressed or minced
- 1/4 teaspoon red chili pepper flakes (adjust to taste)
- 1/4 cup chopped cilantro, for garnish
Instructions
- Line pans: Line two half-sheet pans with parchment paper or foil, then spray very well with nonstick spray and set aside.
- Prepare crumbs: Whisk eggs and milk together in a shallow dish. Place 1/2 cup sliced almonds into a food processor and pulse until finely ground. Pour the almond crumbs into another shallow dish. Process Rice Chex cereal until fine crumbs form, then add to the almond crumbs. Season the combined mixture with salt and pepper to taste.
- Coat chicken: In a large Ziplock bag, add gluten-free flour, 3/4 teaspoon salt, and 1/2 teaspoon pepper, then toss the chicken strips until well coated. Shake off any excess flour, then dip each strip into the egg mixture, and roll in the almond and breadcrumb mixture, pressing firmly to ensure the crumbs adhere. Place coated chicken fingers onto the prepared baking sheets.
- Chill: Refrigerate the coated chicken fingers for 20-30 minutes to allow the breading to fully adhere. This crucial step prevents the coating from falling off during baking.
- Bake first round: Preheat the oven to 425°F (220°C). Spray the tops of the chicken fingers with extra virgin olive oil or nonstick spray. Bake for 10 minutes.
- Flip and bake again: Carefully flip the chicken fingers, spray the tops again, rotate the pans for even cooking, then bake for an additional 7-9 minutes until golden brown and cooked through.
- Make the sauce: While baking, combine sweet chili sauce, water, brown sugar, tamari, rice vinegar, lime juice, ground ginger, minced garlic, and red chili flakes in a small saucepan. Bring to a simmer over medium-high heat, then reduce heat to medium and simmer for 5-6 minutes until the sauce thickens slightly.
- Glaze chicken: Pour the sauce into a wide bowl. Using tongs, dunk each baked chicken finger into the sauce, then return to the baking sheets.
- Final bake: Bake the sauce-coated chicken fingers for 4-5 more minutes, keeping a close eye to avoid burning, as the sauce caramelizes and becomes sticky.
- Garnish and serve: Sprinkle the remaining 1/4 cup sliced almonds and chopped cilantro over the finished chicken fingers. Serve immediately for a crisp, flavorful dish.
Notes
- For gluten-free preparation, ensure all ingredients including tamari and rice Chex are certified gluten-free.
- If you do not have a food processor, finely chopped almonds and crushed gluten-free crackers can be used as a substitute.
- Adjust red chili flakes to control the heat level of the dish.
- Refrigerating the coated chicken fingers before baking is essential to keep the breading intact.
- Use nonstick spray or oil to keep chicken fingers crispy and prevent sticking.
- Serve with a fresh side salad or jasmine rice for a complete meal.
Nutrition
- Serving Size: 4 oz (about 3 chicken fingers)
- Calories: 320
- Sugar: 12g
- Sodium: 450mg
- Fat: 14g
- Saturated Fat: 2.5g
- Unsaturated Fat: 9g
- Trans Fat: 0g
- Carbohydrates: 25g
- Fiber: 3g
- Protein: 28g
- Cholesterol: 85mg
Keywords: Thai chicken fingers, gluten free chicken, sticky chicken recipe, almond crusted chicken, baked chicken fingers, sweet chili chicken, Thai appetizers